Thursday, April 24, 2014

Extra Dark Chocolate Cake with Salted Extra Dark Chocolate Frosting

Was messaging friend D during the long Easter weekend of what I had been baking and she told me that her birthday was coming.. In a couple of days actually.. So i told her, let me bake you a cake then.. That got me thinking what cake should I bake.. It has been so long since I baked a full cake.. Think the last round it was in January 2013 when I first started the blog.. hahaha. it was that long.. New work and everything just took me away from my beloved baking.. It was really awesome to continue baking.. I felt so happy to bake. Felt so nice during the long weekend.. Baked so many stuff (recipe coming soon)

Long story short.. I decided to bake chocolate cake.. Went to Phoon Huat and saw this "Extra Dark Cocoa Powder" and I was like.. Wow... How dark is extra dark.. bought a pack back and oh my.. it was like the charcoal powder.. No kidding..
SO So Black :) I like 

Ingredients (makes a good 8-12 slices, depending on how big or small you want to slice the cake. but 12 is still too big for me.. haha) Adapted from Joy Of Baking's Simple Chocolate Cake

For the Cake
  • 425g of Sugar
  • 245g of Plain Flour
  • 75g of Extra Dark Cocoa powder
  • 1 1/2 teaspoon of baking powder
  • 1 1/2 teaspoon of baking soda
  • 1/2 teaspoon of salt
  • 1/2 Cup of Flavourless Oil (I use Canola Oil)
  • 1 Cup Milk
  • 2 Large Eggs
  • 1 1/2 Pure Vanilla Extract
  • 1 Cup Warm Strong Espresso 
For the Frosting
  • 226g of unsalted butter
  • 3 to 3 1/4 Cups  of icing sugar
  • 1 teaspoon of vanilla extract
  • 50g of Extra Dark Cocoa powder
  • 3/4 teaspoon of salt
  • 2 to 3 tablespoon of Milk

Method:
For the Cake: 

  1. Preheat Oven to 180C. Set aside 2 9" by  1.5" round pan with parchment paper and oiled. 
  2. Add all the dry ingredients (first 6 items) together in a large mixing bowl. Mix well.
  3. Combine all the wet ingredients together. Whisk well 
  4. Add the Wet Ingredients to the dry ingredients until combined. 
  5. Bake the cake batter for 27 - 30min or until a toothpick comes out clean when poked into the middle of the cake. Remove from oven and let it cool in the pan for 10 - 15min and the top side down on a wire rack 
Note: Instead of using butter for most recipe, it is good to use oil. Oil will not dried up like butter will and even when refrigerated will not hardened.. Which gives you a moist and soft cake to eat.. *Yum Yum*

For the Frosting: 
  1. Sift the icing sugar and cocoa powder separately
  2. In a stand alone mixer, using the paddler attachment, stir the butter till it is pale and creamy looking. Add in the vanilla extract and salt. Continue to mix until combine.
  3. Add in the sifted cocoa powder. Mix well.
  4. Slowly add the icing sugar 1/4 cup at a time. Halfway through adding in the sugar, pour in 1 Tablespoon of milk. This will help to mix the icing sugar better with a bit of liquid. Keep alternating the addition of the icing sugar and milk till you get the right consistency and the sweetness level. 
Note: Another reason I alternate adding icing sugar and milk is because I worried if the frosting is too sweet. (Not much of a sweet tooth for me.) 


To assemble the cake.. 
I made it more rugged looking.. Not bad eh. 
  • You might want to cut flat the cake (sometimes the cake baked with a little bulge). What I did earlier, which is to put the top side diwn is to try to flatten the bulge as much as possible. 
  • Putting the flatter side of the cake at the bottom of your cake stand, spread a layer of the frosting on top of the cake. The amount really depended on how thick you want your frosting to be. 
  • Next, place the next layer with the less flatter cake touching the frosting. (This way, I created a flat top that you see in all cakes at the cake shop. You might see some gaps between the 2 layers of cake, no worries, you can fill them up with more frosting. *Yum Yum*)
  • Crumb coat the whole cake. Crumb coat means applying a thin layer of your frosting and then refrigerate the whole cake for a good 10 min. This will help in providing a crumb free surface to work with while you frost the cake. Once you frost the cake to the level of perfection, you can leave it as it is (which is what I did for the cake) or add decoratives items to beautify the cake :)

Friend D was very surprised that I made her a cake. She was just kidding. But wells, I told her I was doing.. And am happy to be baking for her.. Made me wanna bake more cake for more people and for any occasion..
With candle and "Happy Birthday" decorative item.


Peeps! Give me more reasons to bake.. I really love to see people enjoying my cake :)

Sunday, April 13, 2014

Cajun Chicken -- going sounthen

Was a bit out of ideas of what to cook on a Saturday Lunch for the family.. So I thought.. Hey bought some cajun seasoning from Phoon Huat.. Let's make some Cajun Chicken.. Went to market, bought the chicken breast only to find out that I did not buy Cajun Seasoning.. I only bought red chili flakes and ground cayenne pepper ... I know..

OMG!!! I know  (*pic from The Guardian)


Anyway, i decided to make do with what I have.. And thanks to Jason I had some dried herbs at hand to make a Cajun seasoning. It was quite easy to make actually. And it turned out to be quite yummy.. woohoo.. hahha.. maybe 10min of prep time + 30min or more of marinating time + 10 min of cooking.. It is very easy to do.. Can also marinate in the morning (even better, all the goodness is being soaked into the chicken) and have it cooked when you are back from work.. yea!

Here how I made it:

Ingredients (Make 4)
  • 4 chicken breast
  • 2 Tbs Olive Oil
  • 3 Tbs Ground Cayenne Pepper
  • 3 tsp Dried Oregano
  • 3 tsp Dried Thyme
  • 3 tsp ground black pepper
  • 2 tsp salt
  • 1 clove garlic (finely minced or grated)
  • 1 shallot (finely minced or grated)
*Note: Usually the cajun seasoning calls for dried onion and garlic powder but since I do not have them in hand.. no choice, I went to minced them but I lower my portion cos minced onion and garlic are more overpowering than the powdered form..

Directions:
  1. Using a rolling pin, pound the chicken breast till it is even in height of about 1.5cm. Ensure that the chicken is dried using kitchen towel.
  2. Mix all the spices/herbs/salt/garlic/onion into a small bowl. Set aside
  3. Rub about 1-2 teaspoon of oil onto the chicken breast and coat the chicken with the dry mixture evenly. Set aside in the refrigerator for at least 30min.
  4. Heat up a non-stick pan with half of the remaining olive oil, place 2 chicken breast at one time. Cook the chicken 4-5min each side. And you are done. 

Chomp Chomp.. Meat Galore.. 

Note: This is good to serve with Mash Potato and some mixed vegetables.. You are all set to go.. :)


Tuesday, April 1, 2014

Banana Bread.. Version 2.0 .. My quest to healthy yet tasty bread

Since Kimmie asked me to make Banana Bread, I decided to make one from the previous recipe and another one with an improved recipe.


This time, i decided to change plain flour to oatmeal flour and reduced the amount of sugar by 25%

Let's now talk about Version 2.0

Ingredients (Makes 1 loaf)
  • 1 3/4 Cup of Oatmeal Flour (Take around 2 Cups Oatmeal and grind)
  • 1 tsp of baking soda
  • 1 tsp of baking powder
  • 1/2 tsp of salt
  • 1/2 tsp of Cinnamon Powder
  • 1/2 Cup of low-fat yoghurt (thinking of trying greek yoghurt the next round)
  • 3/4 Cup of sugar (thinking of lowing the sugar amount the next round)
  • 2 large eggs
  • 5 medium sized ripe bananas, mashed ("kim-jio" for those living in Singapore)
  • 1 tsp of vanilla extract
  • Zest of 1 orange (medium size)
Directions
  1. Preheat oven to 180C. Set aside a 9" by 5" loaf pan with parchment paper and greased with butter or non-stick spray. 
  2. Take the oat (rolled or quick) and grind it for a couple of mins. It is okay if it is not finely grinded.  
  3. Mix the 1st 5 dry ingredients together and set aside. 
  4. Add the orange zest into the mashed banana and mixed well.
  5. In a mixing bowl cream the sugar and the yoghurt together for a couple of minutes. Add egg and continue mixing till well combined. 
  6. Add in the banana-orange zest into the mixing bowl. Mix them till well combined. 
  7. Lastly, add in the dry ingredients and stop mixing once 90% of the dry ingredients are combined. Using a spatula, fold to ensure all the dry ingredients are well mixed. This is to prevent over-mixing and the formation of gluten in the flour. If so, the bread will be tough. 
  8. Pour the batter into the loaf pan and bake for 35-40 min or until when you insert a toothpick into the middle of the loaf and the toothpick comes out clean. 
Apparently it is faster to bake banana bread made from oatmeal flour.. Wells. 

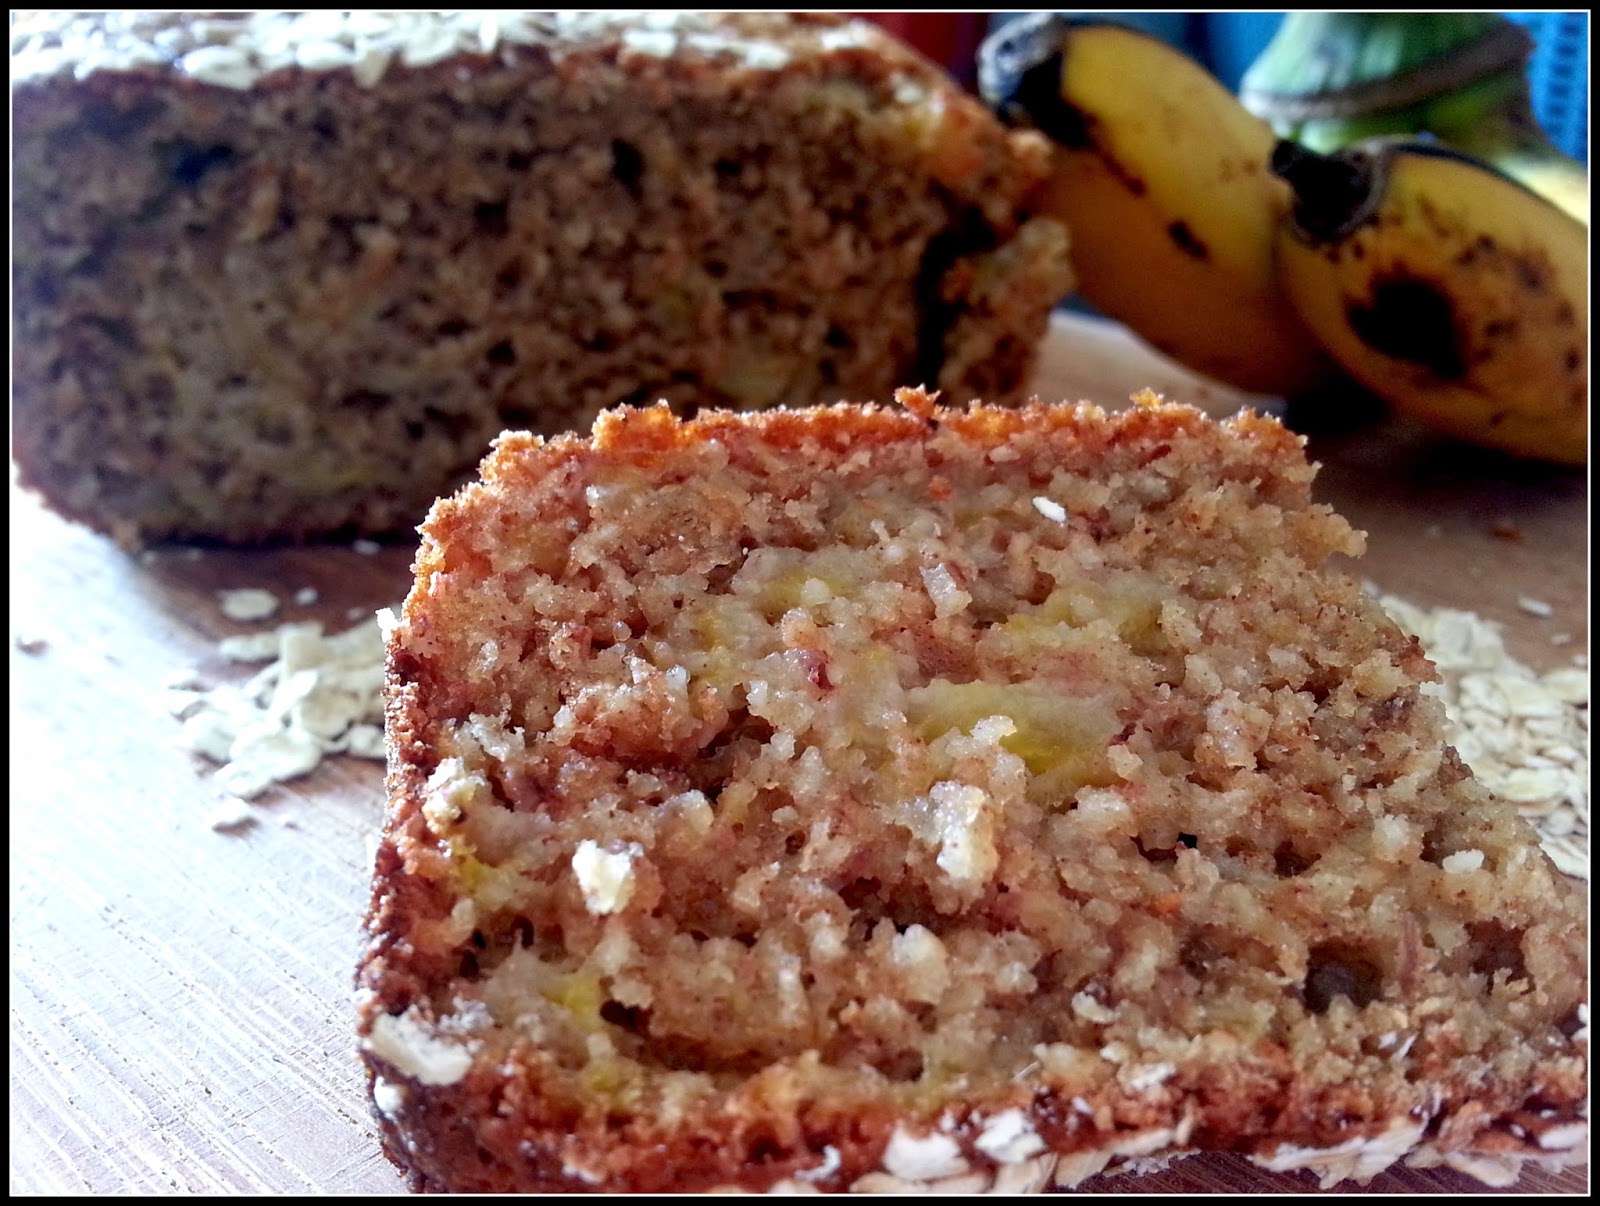
Yea... Banana Bread... I added oat on top to give it a more "healthy" look.. Hahha

You can still see chunks of banana in the bread... 

Saturday, March 15, 2014

Bababa Banana Bread version 1.0

After the holidays. Christmas - New Year - Lunar New Year... Oh My! I have gained quite a bit of weight here and there... wells basically the whole body la.. Sigh.. Have been eating healthier and hitting the gym more often.. On top of that, trying to build more muscles so that I can increase my metabolism rate..

Was a bit bored at home and have not been baking (hence no posts recently)... Work has taken most of my time.. by the time I reach home, I am so exhausted, the last thing on my mind is bring out that flour and bake some thing... It was kind of depressing though.. Not able to do what I like to do... Like my energy is being sucked away. Ok, I digressed a bit.. So... Back to me being bored at home.. I decided to bake something simple to kind of get the engine going... Macarons were out of the questions.. Brought the icing sugar and almond meal out only to put them back in a split second.. Saw some banana.. Ah Ha! Banana Bread then.. But banana and bread.. not very calorie friendly.. Hmm.. I went searching the internet.. looking of how i can make it healthier.. Wow.. a few nice substitutions  out there to replace high calorie ingredients to something more healthy.. I decided to go slow one at a time.. replacing one ingredient with a healthy one each time i baked.. So to experiment and to come out with a more healthy yet incredibly delicious one to recommend.. Am thinking if I should record my whole journey here or just the successful ones.. Wells lets start with version 1.0


Ingredients (make 1 loaf)
  • 1 3/4 Cup of Plain Flour
  • 1 tsp of baking soda
  • 1 tsp of baking powder
  • 1/2 tsp of salt
  • 1/2 tsp of Cinnamon Powder
  • 1/2 Cup of low-fat yoghurt (thinking of trying greek yoghurt the next round)
  • 1 Cup of sugar (thinking of lowing the sugar amount the next round)
  • 2 large eggs
  • 5 medium sized ripe bananas, mashed ("kim-jio" for those living in Singapore)
  • 1 tsp of vanilla extract
  • Zest of 1 orange (medium size)
Directions
  1. Preheat oven to 180C. Set aside a 9" by 5" loaf pan with parchment paper and greased with butter or non-stick spray. 
  2. Mix the 1st 5 dry ingredients together and set aside. 
  3. Add the orange zest into the mashed banana and mixed well.
  4. In a mixing bowl cream the sugar and the yoghurt together for a couple of minutes. Add egg and continue mixing till well combined. 
  5. Add in the banana-orange zest into the mixing bowl. Mix them till well combined. 
  6. Lastly, add in the dry ingredients and stop mixing once 90% of the dry ingredients are combined. Using a spatula, fold to ensure all the dry ingredients are well mixed. This is to prevent over-mixing and the formation of gluten in the flour. If so, the bread will be tough. 
  7. Pour the batter into the loaf pan and bake for 40-45 min or until when you insert a toothpick into the middle of the loaf and the toothpick comes out clean. 
I know.. Don't look that appetizing 


This bread surprisingly baked faster than the normal banana bread recipe.. Usually the bread will take around 1h or more to bake.. I checked it at the 40min mark and it turned out done.

But look how airy the bread is.. not those normal dense banana bread. The air pockets make it very chewy too


Surprisingly, the yoghurt turned out to be quite a good substitute for butter... Now I know.. Got quite a few good compliments from the family and friends.. Even the picky sunshine said it was good.. Moist and the sweetness is just nice... Yea my first experiment was a success!

Monday, December 23, 2013

Lil' Gingerbread Men...

Ho Ho Ho

Merry Christmas! It's the time of the year where giving is promulgated...  It's a time of giving. And during this time, I'll start baking a Lil sth for friends and family..  So happy that I can give...  Apparently, I love to give my baked goodies that I'm receiving lots of cook book this year..  Haha. Talk abt reaping what you sow..  Wells. That will be for another time of sharing..  Back to my gingerbread men..  So this year we decided to bake gingerbread men for the cg... Oh,  and by we, I meant Kim (my cousin) and me..
Kim came to help.. Pic of us when we were all exhausted. 

On the day before bake day,  I started making the dough..  Let's just put it this way..  Living in a tropical country with super high temp n humidity means ur dough melts like nobody business..  That is cos the dough is packed with lots of butter.. And butter melts fast in our climate. So I left the dough to sit in the refrigerator overnight so that the dough can harden a bit..  We made a total of 8 batches...  48 gingerbread men &  women..  


For the recipe, I used Laura Vitale's recipe: (Yield about 48 Gingerbread Men/Women)

Ingredients: 
For the Cookie:
  • 3 cups of All Purpose Flour
  • 2 tsp of Ground Ginger
  • 2 tsp of Ground Cinnamon 
  • 1 tsp of Baking Soda
  • ½ tsp of Ground Cloves (Did not have Cloves, changed it to 5-spice powder, works just as well)
  • ½ tsp of Salt
  • 1 ½ cups of Unsalted Butter, at room temperature
  • 1 cup of Brown Sugar
  • ¼ cup of Molasses
  • 1 Egg
For the royal icing:
  • 1 teaspoon lemon juice
  • 1 large egg white
  • 1.5 Cup icing sugar
  • Food Colouring
Directions
  1. Mixed the first 6 ingredients into 1 bowl.
  2. In another mixing bowl, cream butter, molasses and sugar till fluffy
  3. Add dry ingredients together till a sticky dough is formed. 
  4. in a well-floured surface, put the dough together till it becomes a dough. Cut it to 4 pieces and place each piece into a cling wrap and wrap it up tightly. Place it in the refrigerator for at least an hour (I put mine overnight)
  5. Once the dough is chilled and good to work with, place the dough in between 2 parchment paper. Roll the dough to about half a cm thick. Using the gingerbread man cookie cutter, cut out desired shapes and place it on a baking tray lined with parchment paper.
  6. Bake it for about 10 min in the oven at 180C
  7. Let it cool completely before you decorate your gingerbread man :)
Note: 
  • The weather is SIngapore is hot and humid.. This means that the butter in the dough will melt very fast.. What I did is to quickly cut and re-roll the dough.Immediately place it into the freezer section so that the dough can chill faster. If at anytime the dough becomes too soft to cut out the shape, place the dough straight into the freezer to harden the dough. 
  • It is best to leave your decorated gingerbread men out for at least a couple of hours just to ensure the royal icing dries up completely before you pack them. Else your hard work will be smudge and gone to waste. 
Fresh out from the oven

Using white, neon pink & neon green to decorate the gingerbread man :) 

Angry Gingerbread Man
Merry Christmas! Have a gingerbread man with a cup of hot tea..Just Nice :)


JJ enjoying his gingerbread man :)

Friday, August 9, 2013

Shepherd's Pie OR Cottage Pie.. HMMM.....

Shepherd's Pie ... Cottage Pie... What's the difference..? I have no idea the difference before I started making it... I always thought Shepherd's Pie is made from beef and I have no clue what is cottage pie made from.

 
Apparently, to the chefs, it is wrong to put beef in shepherd's pie. The fact that it is called shepherd's pie is because it is made from mutton, something that the shepherds had readily - sheep.. "_" But alas, I only home cook.. I like beef in my shepher

First started cooking Shepherd's Pie as I thought it will be a simple dish to serve my guest... Wells.. You would not really go wrong with it... It's quite simple to  do cook... Just the preparation is quite a task..Hahah The grating is one tedious thing to do.. I usually spend quite a while grating them... But now no more.. My hand food processor is doing the job.. SO SO SO happy :) Done in a matter of minutes..


Here you go the recipe:

Ingredients (Feed around 4pax) (Adapted from Gordon Ramsay's Shepherd's Pie Recipe)

For the Filling
  • 600g Ground Beef
  • 1 Large Carrot, Grated
  • 1 Big Yellow Onion, Grated
  • 4 Cloves of garlic, Minced
  • 1/2 Cup Tomato Puree / Sauce
  • Fresh Herbs (Rosemary, Thymes or any substitute)
  • Few Splashes of  Worcestershire Sauce
  • 1/4 C chicken stock
  • 3-4 Tablespoon of Red Wine
  • Salt
  • Pepper
  • Oil
For the Mash:
  • 6-7 golden potato
  • 2 egg yolks
  • 1/4 C of heavy cream
  • 50g Butter
  • 1/4C + 2T Parmesan Cheese
  • Salt
  • Pepper
Directions
  1. Preheat the oven to 200C
  2. Boil the potatoes for 15minutes. Mash the potatoes using potato masher / fork / stand mixer (w/paddle attachment). Add in the rest of the ingredients for the mash (except the 2T of cheese), mix well. Set aside.
  3. In a saucepan, add in some olive oil. When heated, add in garlic and stir for a while. Put in the beef and stir fry for a couple of minutes and add the herbs.  Place the carrot and onion and continue to stir fry for another 2-3 minutes. Pour in the chicken stock, tomato puree and the Worcestershire sauce; stirring after addition of each item. Pour in the red wine and let it sweat for about 5 minutes or until you reduce the sauce by half
  4. To assemble: Place the filling into a casserole. Scoop the mash and even spread it over the filling. Sprinkle the remaining cheese on top of the mash.
  5. Bake the pie for 15-20 minutes or until the pie browned. Served hot.


    Hope you like the pie.. I know sunshine did :)

Wednesday, July 17, 2013

Macarons - A love hate relationship


Nutells Macarons

Macarons oh macarons... I have my fair share of the temperamental macarons... It is so complicated to make them. First you need to be exact in your measurements. Then you need to grind the almond meal and icing sugar to make them finer. After which you need to sieve them to prevent any lumps. Any big pieces are also not allowed: the macarons will look grainy... That is not all, when you fold the egg whites, you must fold till an exact consistency; too little folds and the batter will be too thick to work with, too many folds and the batter will be too watery and will spread too much giving a flat macaron shells.

My macaron journey started last year when I thought my baking skills was good enough to try something more complex and tested my baking skills to another level. Gosh. I think I exhausted like a few kg of almond meal and icing sugar, at least 100 eggs wasted. And the results: my confirmation that this macarons are really a pain in a ass that is as temperamental as a woman’s emotion.. Seriously, the number of times I succeeded can be counted using my fingers. But I made like 50+ times.. You could imagine how many times I failed badly.

Anyway, enough of me ranting. I must say the moment I succeeded a few times consequitively, it was when I felt such great achievement! I must warn you that there is no gain without pain... You need determination and patience when making macarons.. You really need to "sayang" these temperamental pastries. For this round, I made Red Velvet Macarons with Cream Cheese. For those who love red velvet cupcakes/cakes, you will love this recipe.


For the ingredients (for 30 macarons)

To make the macarons shells
  • 120g almond meal
  • 200g icing sugar
  • 50g sugar (as fine as you can find)
  • 100g egg whites
  • Red food colouring paste
To make the cream cheese filling:
  • 1 pkt Philadelphia cream cheese, room temperature
  • 115g unsalted butter, room temperature
  • 210g icing sugar
  • 1 teaspoon vanilla extract
Directions:

For the macaron shells
The batter should spread after piping an inch.
  1. Lay 3 baking sheets with parchment paper. Set aside
  2. Combine the icing sugar and the almond meal together and place the dry mixture into the food processor to grind the mixture finer. Use the pulse setting for a good minute of so. Shift the dry mixture and grind further for those that cannot be shifted. Set aside
  3. Using the whisk attachment, at low speed, whisk the egg whites till foamy. Add in the granulated sugar. Start whisking at medium to medium high speed. When the egg whites are whisked till stiff peaks, add in the red food colouring. 
  4. Fold in the dry mixture into the egg whites. Mix well and until the mixture becomes shiny and a magma consistency. 
  5. With a piping bag and a 0.5inch piping tip, transfer the batter into the prepared piping tip. Pipe the batter onto the baking sheet an inch wide. Keep each macaron shell an inch apart. After piping, tap the baking sheet onto the table until the 'nipples' on the macaron shells disappear. You will see the batter spreading a bit. This is normal. Set aside the batter to dry for at least 30 minutes. Meanwhile pre-heat the oven to 150C.
  6. Once the surface of the batter has dried up, place the batter into the oven and bake for 15-17min depending on size of the macaron shells.
  7. Wait for the shells to cool slightly before removing them from the parchment paper.
  8. Pair up the macaron shells according to their sizes.
For the filling:
  1. In a mixing bowl, mixed the butter and cream cheese until pale and smooth, Add in the vanilla extract. Mix well
  2. Slowly add in the icing sugar and mix till the correct consistency.
  3. Bag the filling into a piping bag with a 0.5inch piping tip.
Finale:
  1. Pipe in the filling into the macaron shells and sandwich it like a hamburger.
  2. Place the macarons in an airtight container and refrigerate it for 24h before serving.

Mini hamburger  😍


Note:

  1. You need to use a metal or glass bowl when whisking the egg whites and the bowl must be oil free. Any oil residue will compromise the whisking of the egg whites. That is why you cannot use plastic bowl as there is always a layer of oil residue no matter how u clean it.
  2. Food colouring paste is preferred to liquid version as too much liquid can affect the outcome of the macaron shells. Also. Macarons do not really work well with light colouring. You need to use more colouring as the colour will become lighter after you bake.
  3. To know whether you macaron shell batter is dry, using your finger and gently touch the side of the batter. A dry batter will not stick onto your finger. If the surface of the batter is not dried up sufficiently, the macaron shells will crack and be footless when baked.
  4. Macarons taste best after 24h of making. This is supposedly coz the macaron shells will absorb the moisture from the filling and becomes soft inside while the exterior portion is still relatively hard.


Must have some photos of people eating the macarons.